
diy: plaster keepsake vase

Somehow our days seem busier than ever during this quarantine with trying to tackle home projects while we are both not working and trying to keep up with homeschooling and of course I’m like snack and food coordinator allll day it seems like haha (i’m sure all of you with kiddos can relate). But because the days seem to be rushing by, I’ve been trying to end each day strong with a little intentional time with the kids- whether that’s a game or a craft or a coarse from Outschool etc. Today we made a fun craft and I think its my favorite project yet: a plaster keepsake vase through repurposing an old vase I was going to donate.
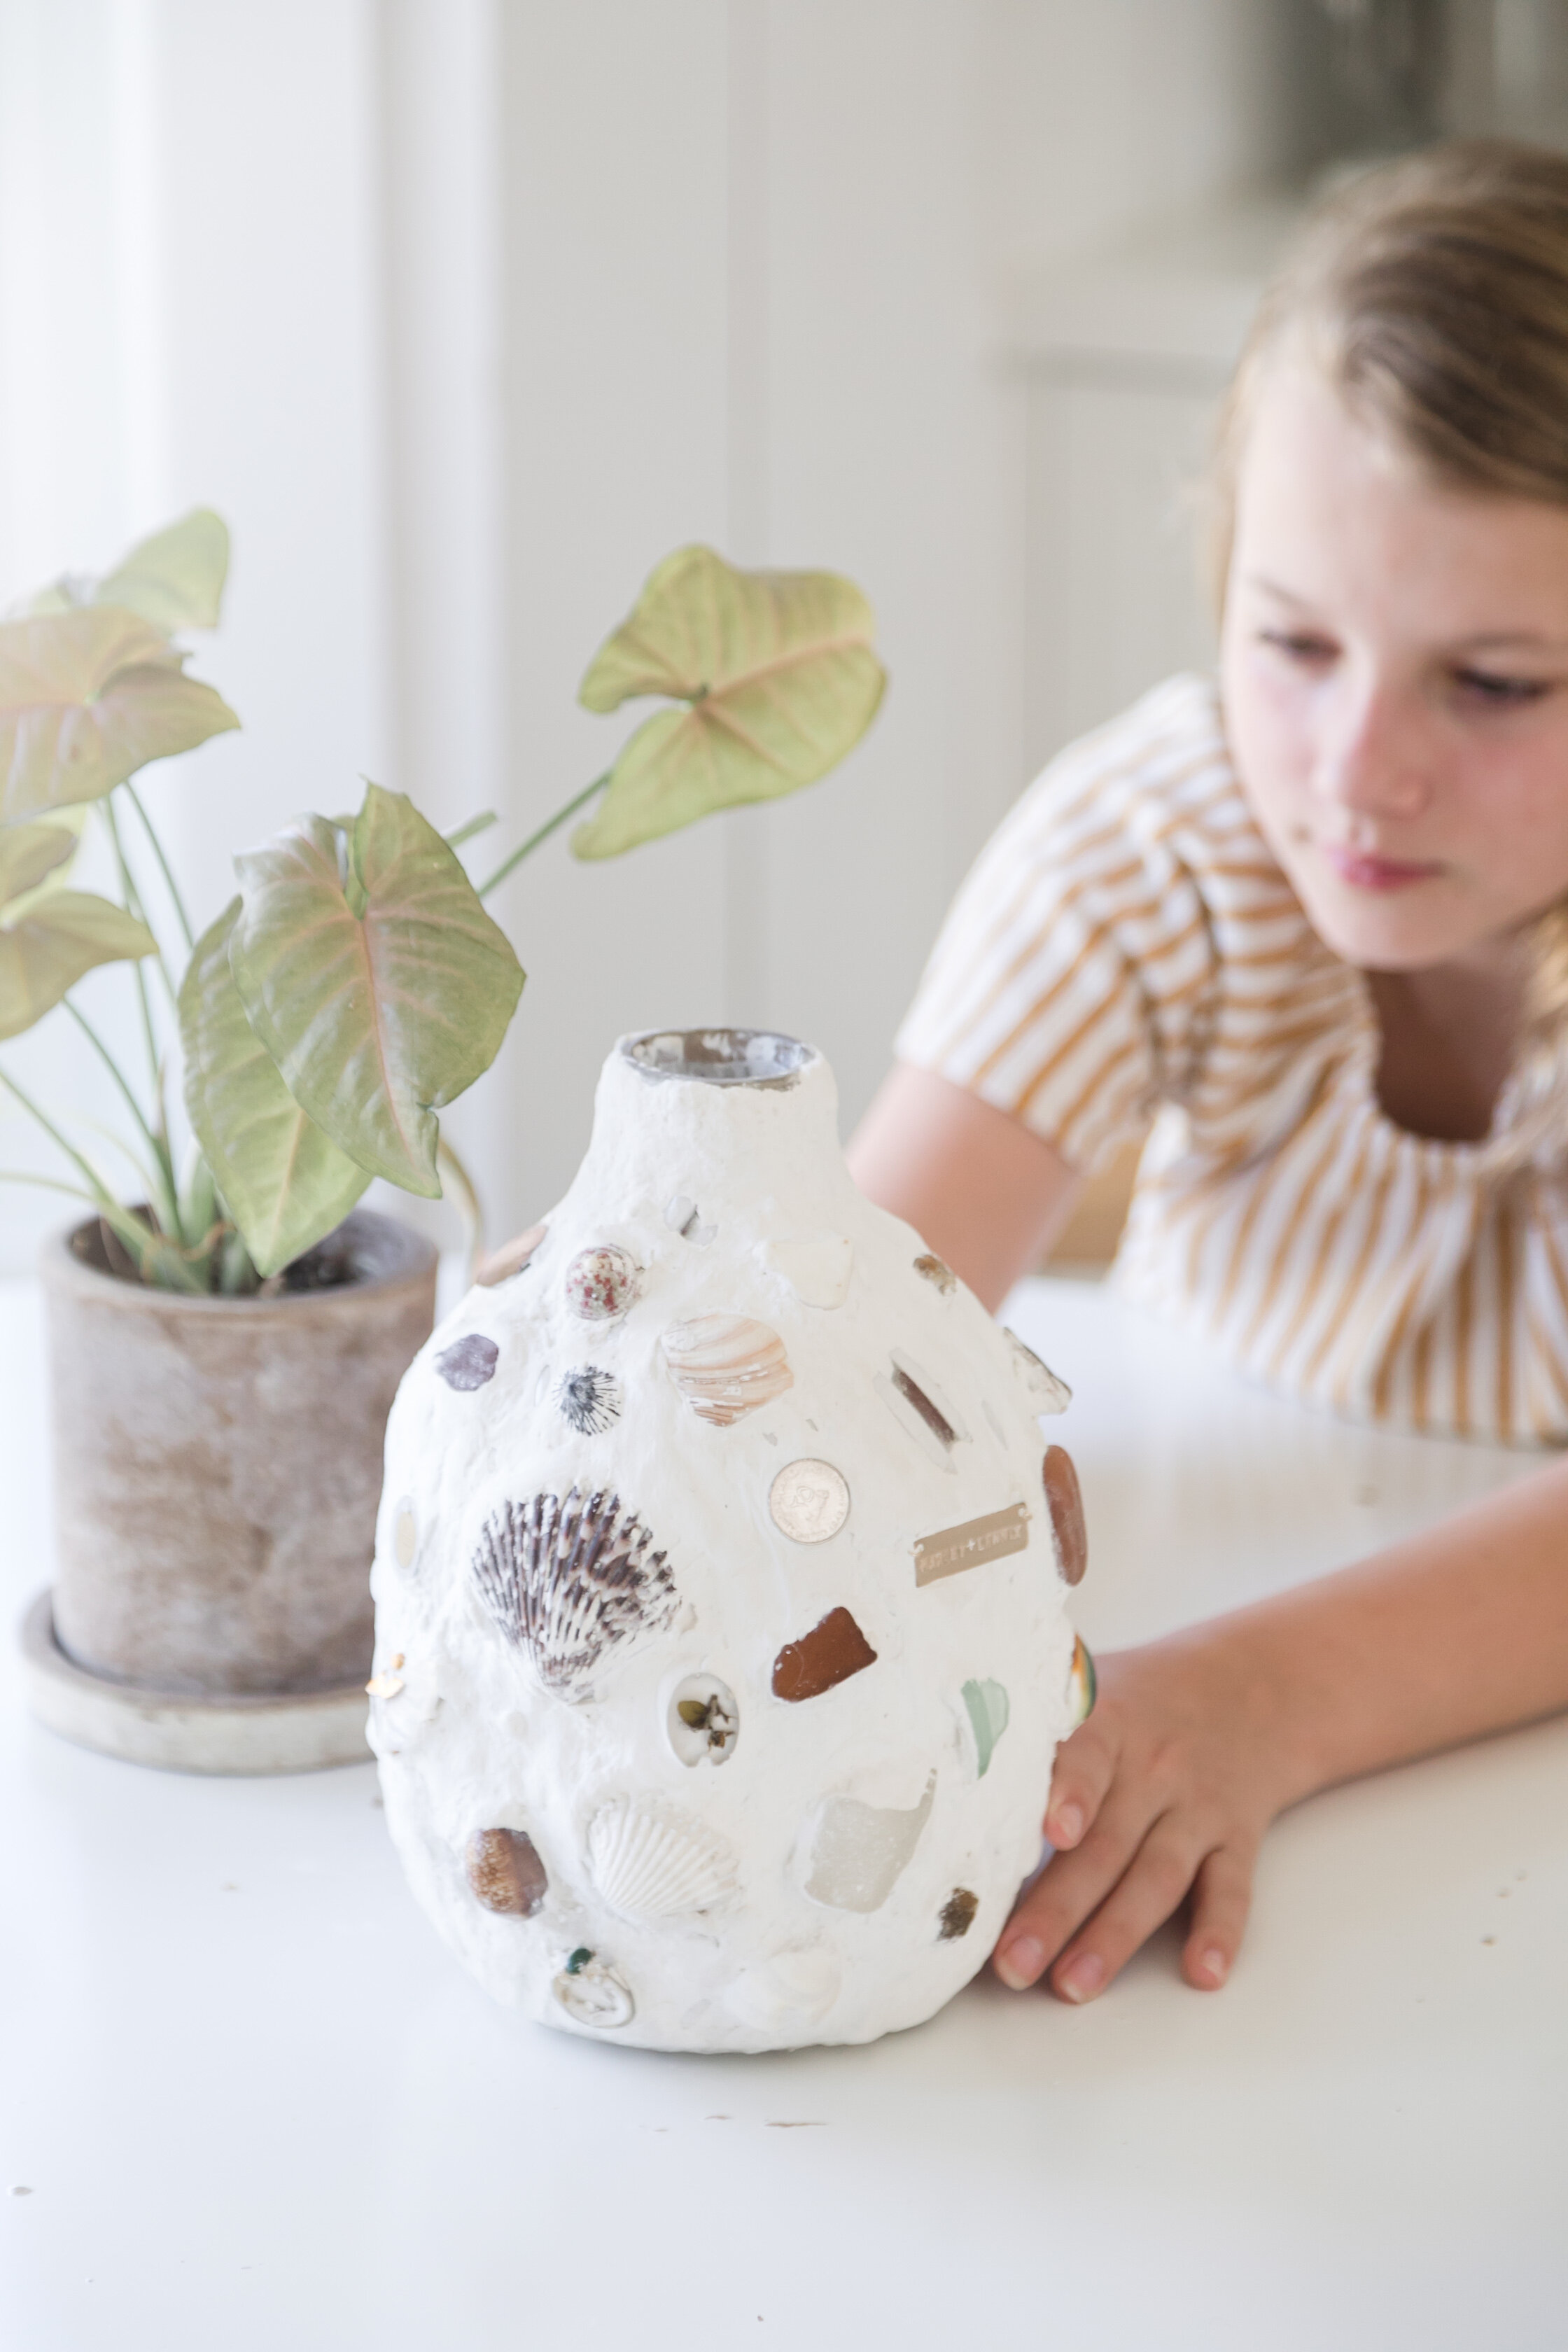
We decided we would use the vase to group together all the misc. souvenirs and keepsakes that we had laying around from special vacations or memories and press them into plaster on the vase so we could have a special vase that we can consistently look at and use while still cutting down on some clutter. Marley and Lennix pooled their shells and some money (dhiram) that we collected from Dubai. We pooled together my grandma’s costume jewelry that had started to tarnish but I still wanted to hold on to, we grabbed shells and rocks from all our trips to Tulum, Mexico and Hawaii and rocks from Montana. It was so fun to relive all the memories as we placed each one into the vase. It turned out perfectly imperfect and although it was an extremely messy project we had soo much fun.

MATERIALS LIST
plaster of paris
putty knife
mixing bucket
an old vase or vessel (repurpose, new or thrifted)
sandpaper
coconut oil + vinegar for cleaning
a sponge or cloth
your special keepsakes
shop the materials


how to make your plaster keepsake vessel
collect all your special keepsakes and lay them out, placing them on the counter in exactly the layout that you want on your vase. this is an important part because the plaster does dry quickly and you have to work fast to place your keepsakes onto the vase, so pre-planning the layout and spacing is super helpful!
clean and fully dry your vase or vessel
mix equal parts plaster with water, although I mixed In a little more plaster until I had a little bit thicker of a consistency (almost like greek yogurt) so I could ensure that the heavier items and shells would stay put.
take your trowel and smear the plaster onto your vase making sure to smooth as much as you can as you go until you’ve covered the entire vase with a coat of plaster.
take your keepsake item and dip that back in the plaster mix and press it onto your vase (don’t worry if they all get really messy and kind of covered in plaster - the plaster is really easy to wipe off once it dries and sets into place)
finish covering your vase with keepsakes and let it set for about 20-30 minutes
take some vinegar on a cloth and start wiping and chipping away the plaster off each of your keepsakes. I used sandpaper on some of the shells and items I wasn’t scared of chipping.
put some coconut oil on a rag and start shining up each keepsake piece until each item is clean and without plaster on it.
voila~ you’re ready to use and display!
let me know if you make this project and tag me on instagram so I can see yours! @amberthrane
disclosure: I saw a similar vase like this at some point on Pinterest that had broken tiles and shells and so I was inspired to create a diy keepsake version based on that picture. if any of you know the source feel free to let me know and i’ll include!