
diy: fall hanging installation

So many people asked for a DIY on this Fall fireplace install that I made with the help of my sister and I only took a few pictures of the process because I wasn’t even thinking about turning it into a blog post… duh! But I hope this helps and you can always ask me additional questions in the comments below and Ill do my best to answer them!
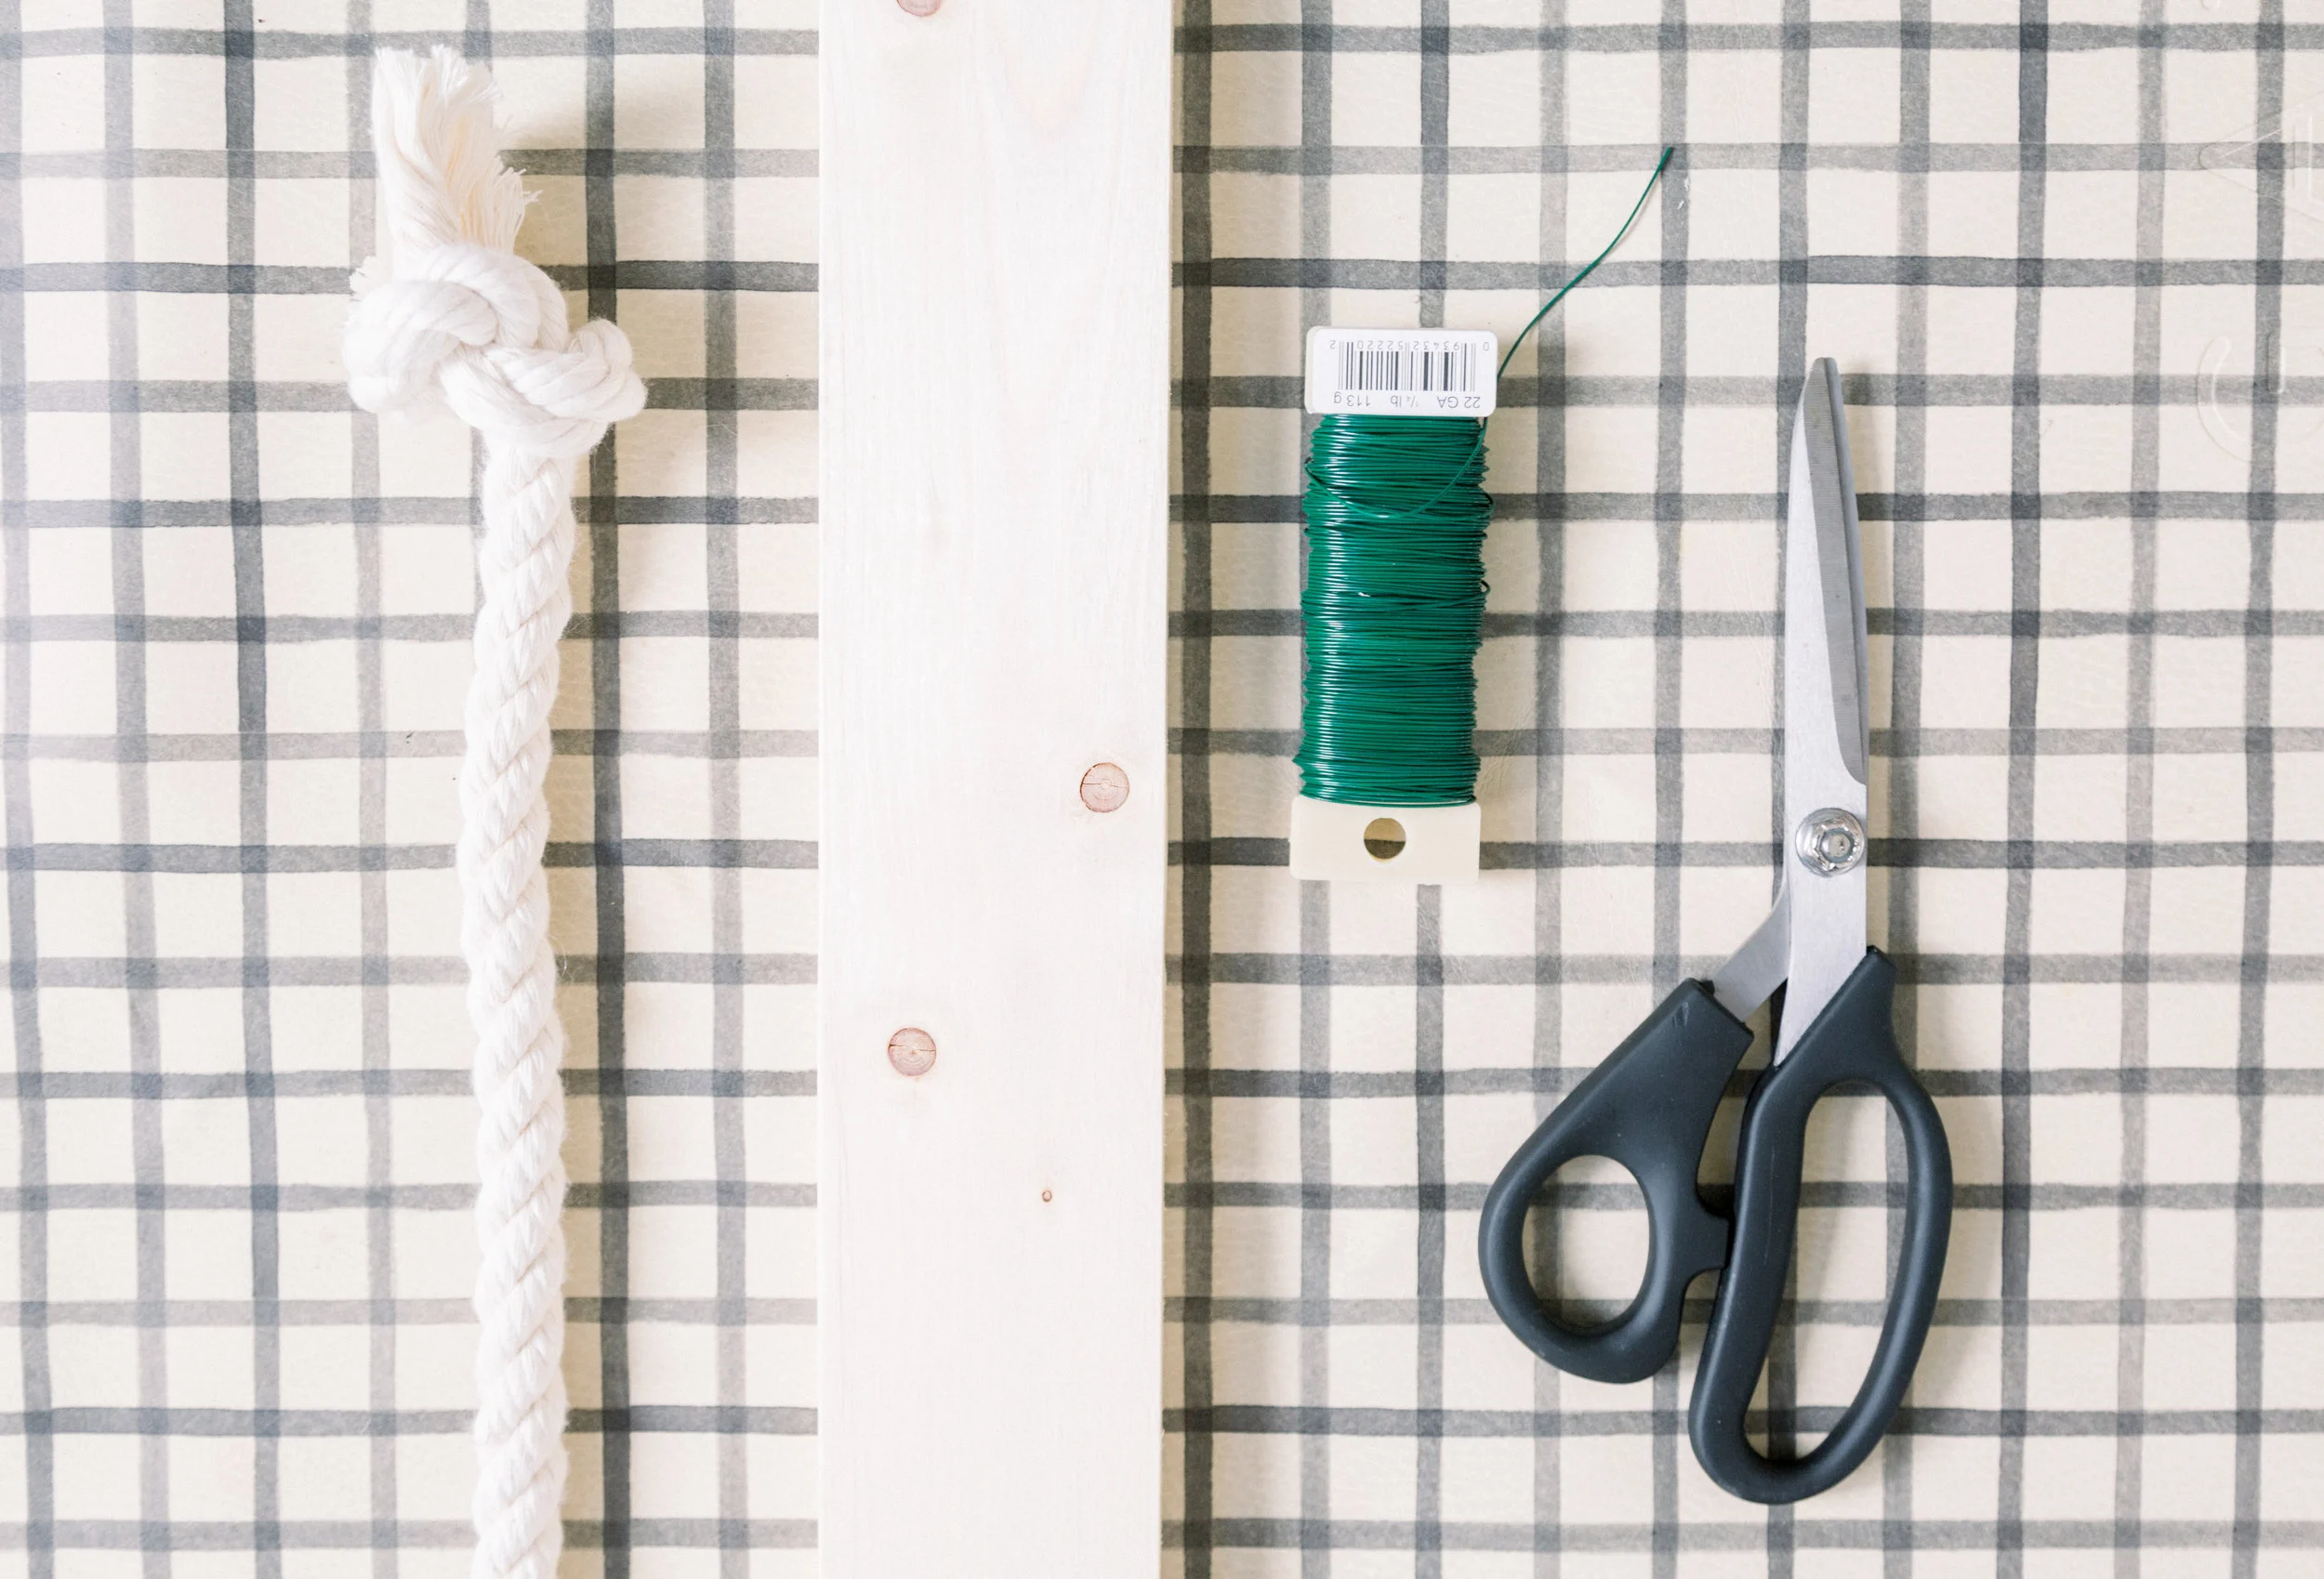
MATERIALS:
drill
1X3 pine (I had this laying around, but 1x2 would work too)
rope
floral wire
scissors or wire cutters
florals (I labeled mine below and linked where to purchase)

LEAF BUSHEL: Ralphs Grocery // POMPAS GRASS: I chopped mine on the side of the road but here’s a link to order online // EUCALYPTUS: Trader Joes // WHEAT: Marshalls or Online Here // BRANCHES: I chopped mine off a dead tree in my yard, so you could do the same or here are some branches online
I measured the fireplace space and figured out how big I wanted the install to be width + heighth-wise. I knew I wanted a wood base to attach the florals to because I wasn’t sure If rope would sag under the weight of the florals so I took some 1x3 pine boards that I had in the garage and had my husband cut them to size and then drill two holes in each end just big enough for me to feed the rope into. I took some macrame rope I had left over (you can also get rope from Home Depot or Lowes) and the thickness of the rope just depends on your personal preference, mine was about 1” thick rope. Then I created a triangle shape and strung the rope through the ends of the board and knotted it to hold.


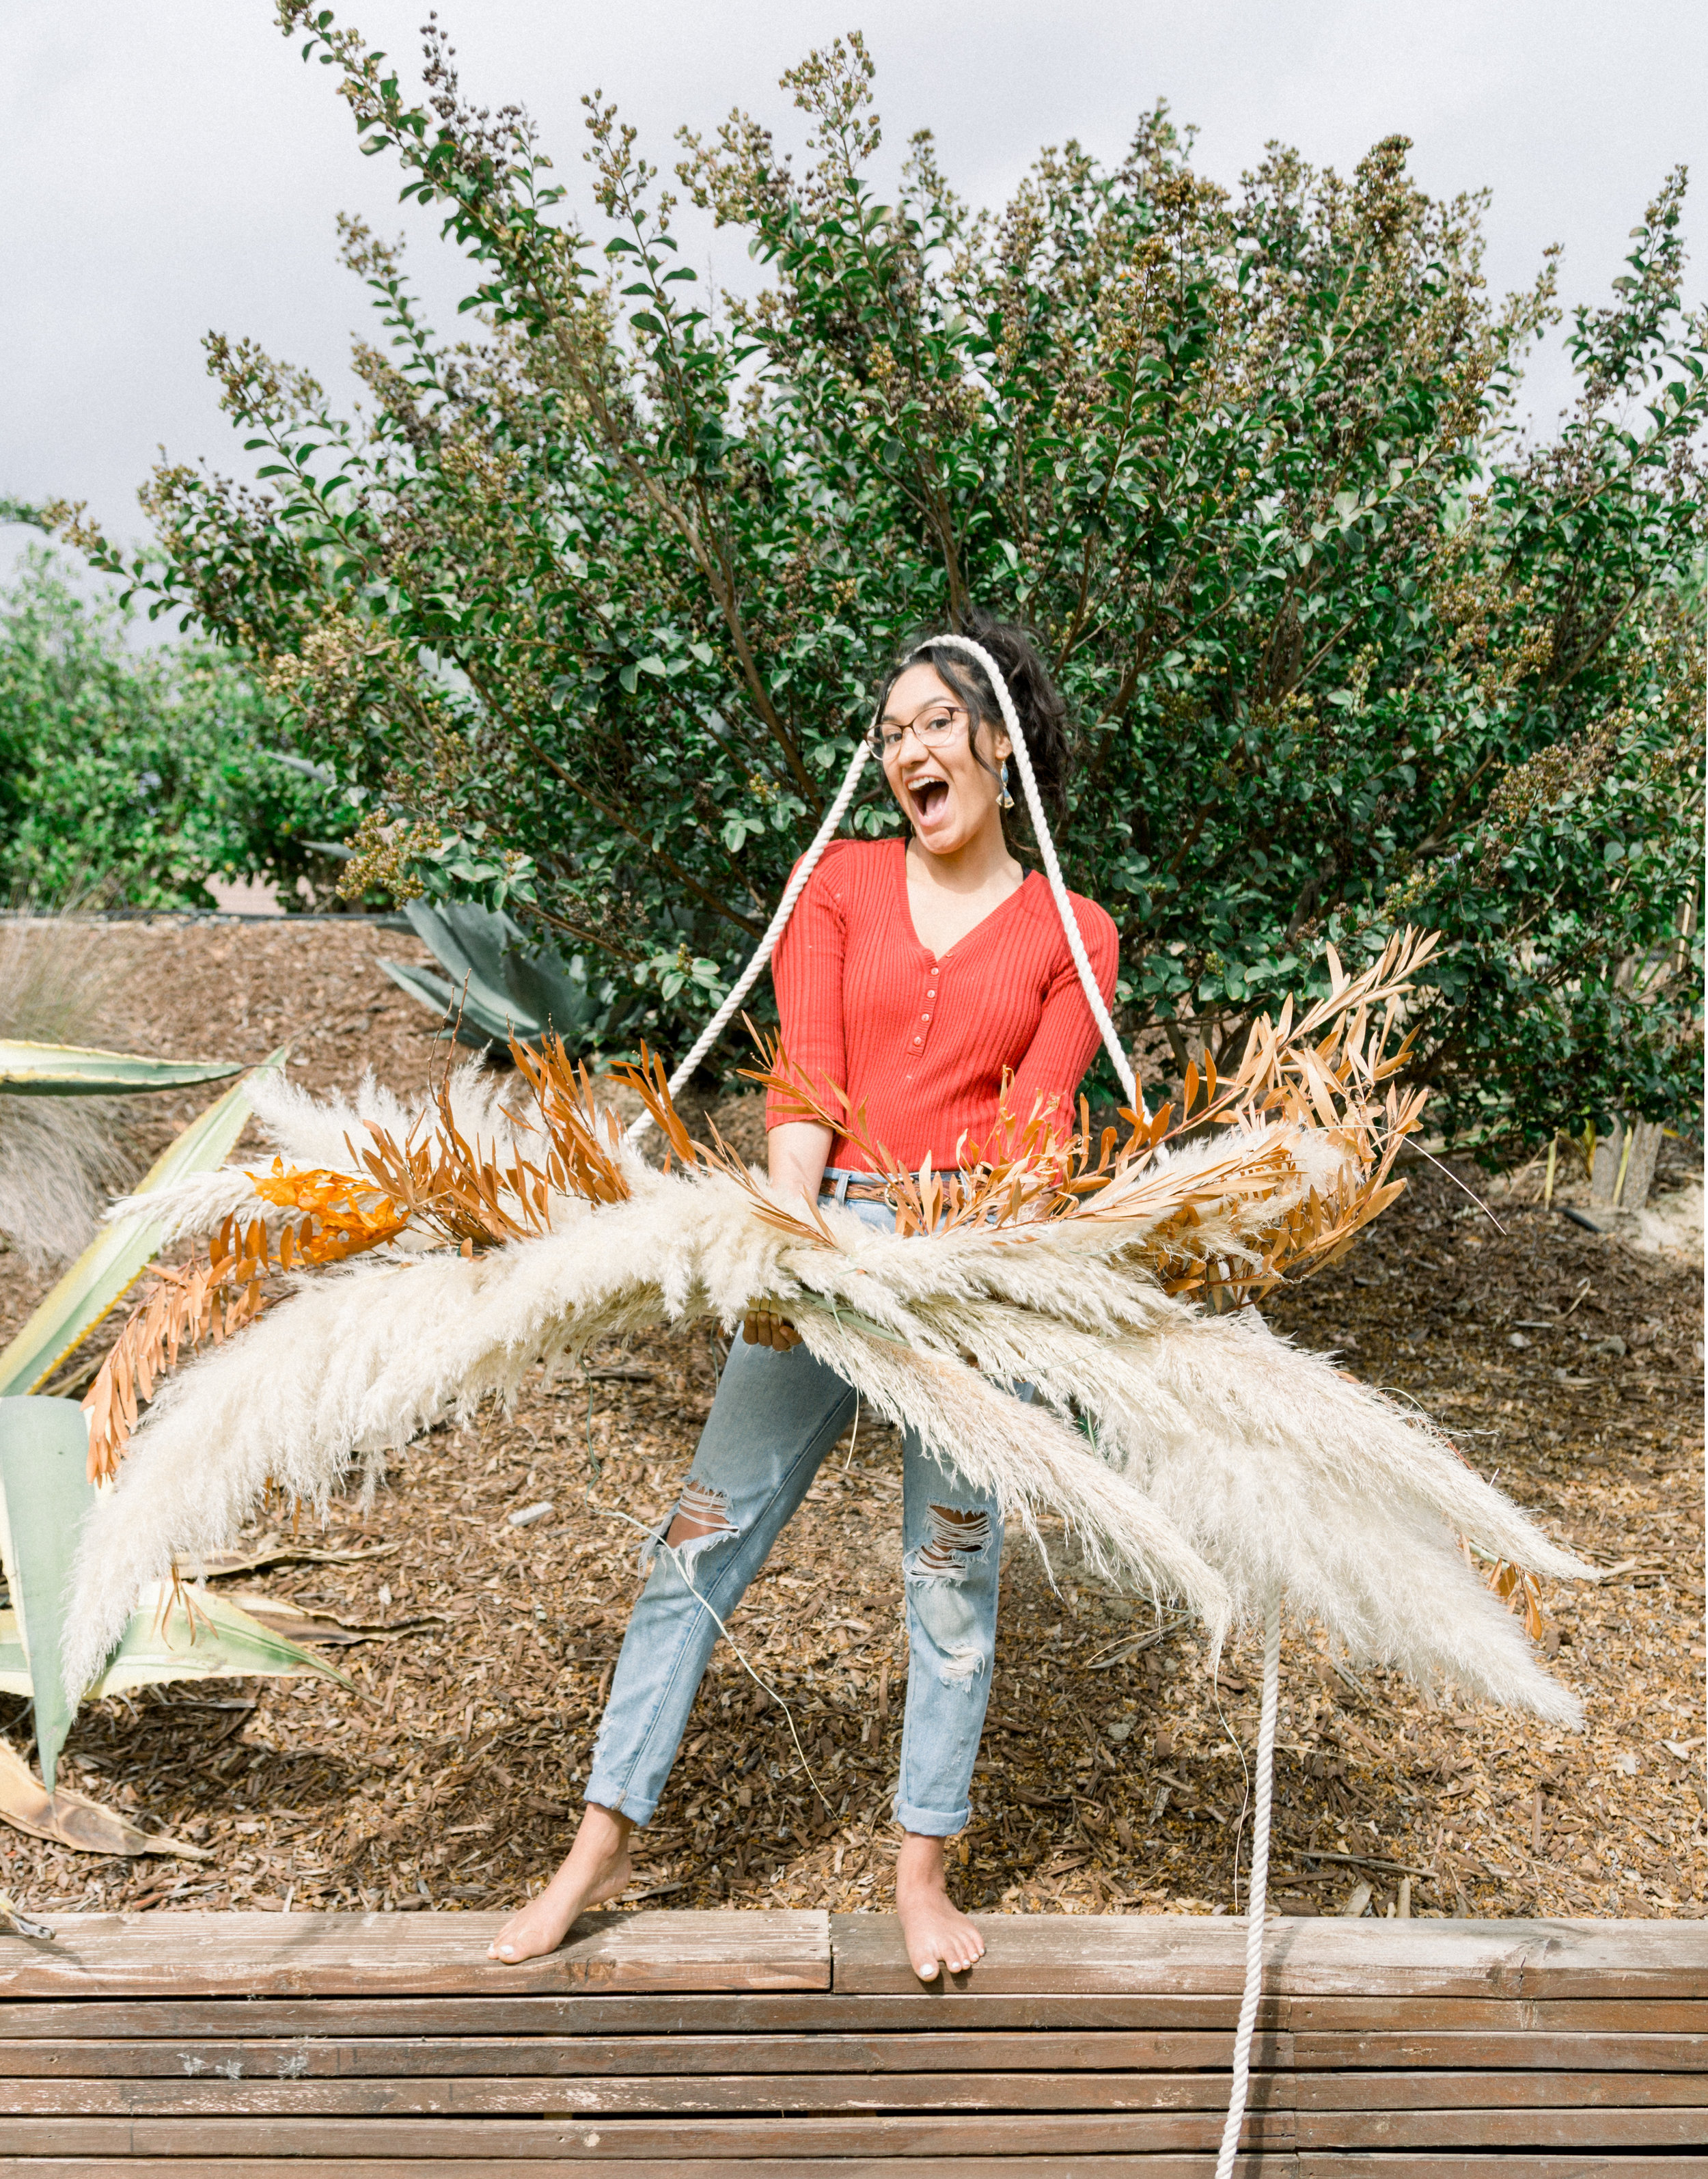
After you make the triangle type shape, take your heftier branches and start making a straight base with them and wire them together with your floral wire making sure they overhang your 1x3 on each side a little bit. (I just cut some wire and wrapped it around a few times and then twisted the ends to secure. I used the branches of a dead tree in our yard because I liked the color and almost added some tan weeds and tumbleweeds too but I got lazy… MORAL OF THE STORY: if you have some yard work to do anyway than kill two birds with one stone and incorporate the clippings into your installation haha!

Once I had a good shape, I attached the branches to my 1x3 board. It helps to hang the triangle up on a tree or nail while you’re attaching the branches so you can step back and take a look at the shape etc. I had my little sister there helping me, so I forced her to hang it from her head while I attached the branches on… so thats always an option too if you have one of those haha!
Once you have a good base with the leaves, start adding your pompas grass (big fluffy stuff) which really fills in the shape and gives it body. Then I worked in the greens, then leaf bunches and finished with the wheat. Try not to be super precise but arrange them so that they get smaller in the middle and have more volume toward the sides. This whole thing only took me about an hour so its not too time consuming at all!


So there you go! If you make it, tag me on instagram or something because I want to seeeee! (@amberthrane)